All posts by hkarim@floorsblvd.com

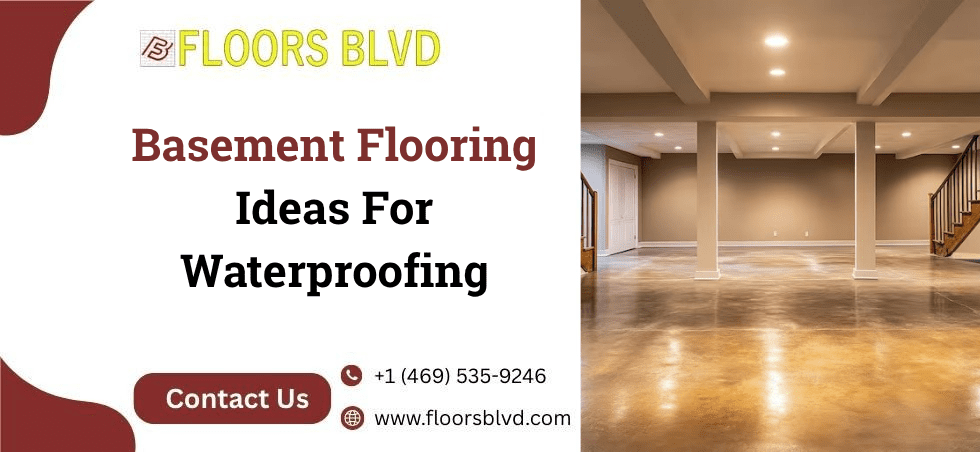
Basement Flooring Ideas For Waterproofing And Easy Maintenance

When it comes to Texas homes, waterproofing basement flooring need special attention. It is one of those spaces in homes that often goes unnoticed. That said, Texas isn’t known for having basements in every home. However, the ones that have, face challenges because of fluctuating soil moisture, humidity, and unexpected water seepage.

Texas is known for its varied climatic conditions – from dry regions in the west to more humid areas near the Gulf. This makes waterproofing inside basement an absolute must for homeowners. A well-protected basement will not only boost the durability of your property, but also prevents mold and mildew growth, thereby enhancing the indoor air quality.

As per the US Environmental Protection Agency or EPA, dampness in homes can often increase the chances of respiratory issues by up to 40%. Thus, investing in waterproofing your basement flooring makes sense.

In this blog, we have discussed some of the most common, easy-to-maintain flooring materials that make the basement more functional, safe, and comfortable to use. So, whether you want to turn your home basement into a guest room, an entertainment space, or a home gym, here are the most effective waterproof basement flooring options that you can go for.

Using Vinyl Plank for Basement Flooring

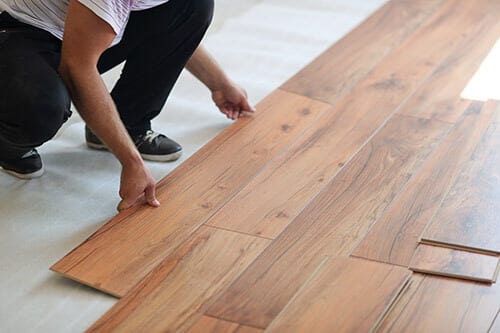
Vinyl plank flooring is by far one of the most popular choices for basement flooring in Texas homes. This is all due to its durability and its waterproofing properties. Modern vinyl floors feature multiple layers, including a waterproof core and a wear layer. On top, there’s a printed layer that literally mimics the appearance of stone or real wood – thus, giving the vibe of wood laminate flooring.

One of the major advantages of using vinyl planks in the basement is that it can withstand a fair bit of moisture and humidity. In fact, it is not prone to warping or swelling, and quite resistant to mold and mildew. All this makes it the ideal choice for basement flooring. Moreover, vinyl floors are easy to maintain. Regular sweeping and occasional mopping is all it takes to keep it looking like new. So, for those seeking waterproof basement floors, vinyl planks can serve as an excellent, long-term solution. To add to it, if you are wondering how to clean vinyl plank flooring, it is one of the easiest surfaces to care for.

Opting for Waterproof Peel and Stick Floor Tile

For homeowners looking for a more affordable yet effective waterproofing solution, going for waterproof peel and stick floor tile makes more sense. As the name implies, this comes with self-adhesive backing, thus helping in quick installation. The best part is that these tiles can be easily laid over existing concrete or subfloors, making them perfect for a hassle-free basement renovation.

One stand out feature of the waterproof peel and stick floor tile is its resistance to temperature changes and moisture. They also do not crack under pressure. These days, they are even available in a wide range of colors, textures, and patterns. So, whether you are going for a rustic wood look or want a modern marble finish for your ‘kitchen remodeling near me’ or for the long overdue basement renovation, the peel and stick floor tiles are a great choice.

Engineered Wood and Laminate Flooring Options

If you prefer the look of hardwood, but want something resilient to moisture, you can go for engineered wood and laminate flooring. As you might have guessed already, traditional hardwood flooring doesn’t fare well when waterproofing basement floor and has a tendency to warp or swell. This is where engineered wood flooring shines. It consists of multiple layers kitchen remodeling near me of wood panels bonded together with adhesive.

On the other hand, laminate flooring offers a similar wood-like appearance, but is more affordable. Most modern laminates come with water-resistant or waterproof coatings, and can thus handle minor spills and dampness. If you are looking for ‘flooring stores near me’ in Texas to lay hands on these, we at Floors Blvd can be of help. Connect with us for more information.

Epoxy and Concrete Sealants for Lasting Protection

For homeowners who prefer a more modern look, try going for the epoxy flooring and concrete sealants. This not only provides the much needed waterproofing needed for basement flooring, but also heightens the overall durability of the floor. Epoxy coatings create a seamless surface thus preventing water penetration. Meanwhile the concrete sealant acts as an added layer of protection. It prevents water from seeping through the concrete pores, thereby waterproofing basement floor from the inside.

But there’s more to epoxy floors than what meets the eye! These are incredibly easy to maintain, which is why they are popular all the more. A simple sweep and mop is all it takes to keep the epoxy floor clean. They also reflect light well, thus making basements appear brighter and more spacious – an added bonus for basements/ underground spaces.

Some Frequently Asked Questions

Is laminate flooring waterproof?

Laminate flooring is water-resistant, though not entirely waterproof. They can handle moisture and hence, are apt for basements. At Floors Blvd, we use quality materials with waterproofing basement floor solutions, to help them fight moisture even better. We make sure that your laminate floors stay beautiful for years.

Is laminate flooring waterproof?

Yes, vinyl flooring is completely waterproof, which is why we recommend using it for moisture-prone areas like basements. At Floors Blvd, we use quality vinyl flooring and have a team of experts who have years of experience in installing these. This is what allows us to make your Texas home feel more functional and beautiful.

How to clean waterproof vinyl plank flooring?

Cleaning waterproof vinyl planks is quite easy. Just sweep or vacuum regularly to get rid of the dust and debris. You can also mop using warm water and a mild floor cleaner. We would strongly advise against using abrasive tools or harsh chemicals. So, if you are focused on waterproofing inside basement areas, this will help you keep the basement floor looking clean at all times.

Is engineered wood flooring waterproof?

Engineered wood flooring is quite water-resistant, which makes it a stylish and durable choice for basements and more areas. Its multi-layered construction is great for protection against humidity. This is what makes it a better choice than solid wood – offering warmth and long-lasting beauty, without the downsides of traditional wooden flooring.

How much does it cost to waterproof a basement?

In Texas, the cost of waterproofing the basement flooring ranges between $2,000 to $7,000, depending on the size of the basement, the severity of the condition, and the materials you use. At Floors Blvd, we recommend investing in quality waterproofing protection for the basement.

Key Takeaway

A renovated and functional basement is more than an extra room. It is a part of your Texas home that needs attention and can be of great use. Whether you want a cozy family area or a storage space, choosing the right flooring is of great importance. At Floors Blvd, we bring years of expertise in flooring installation, repair, and waterproofing basement floor treatments.

Contact Floors Blvd today and find waterproof flooring options that fit your home’s needs.
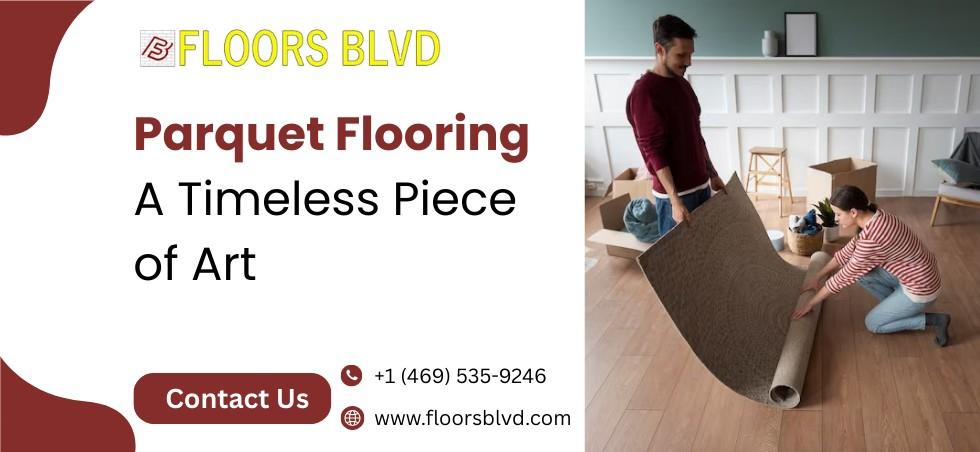
Parquet Flooring – A Timeless Piece of Art

Parquet flooring blends timeless elegance with modern durability through geometric patterns like herringbone and chevron. This guide covers materials, installation, care, and why parquet floors remain a stylish, long-lasting choice for homes.

Parquet flooring is one of the most luxurious and sophisticated flooring options that, of course, comes with a rich history. Art is admired and has a special place during ancient times and even today, it is appreciated and there is parquet flooring in homes. It has the ability to add warmth, beauty, and character from the grand 16th-century palaces in Europe to modern homes and urban lofts.

Parquet possesses traditional craftsmanship and modern artistic designs. Uniquely, it has a style. It has a style that captures the heart and has the ability to transform a space. With a wide range of flooring options, it is unavoidable to fall in love with classic herringbone, timeless checks, and contemporary flooring designs.

Understanding Flooring Wood Parquet: Materials and Construction

Parquet flooring is a type of flooring wood parquet, which consists of small pieces of timber arranged of geometrical patterns to form a floor. It is an art and along with formation and design, a floor captures the heart.

Apart from the features and performance of parquet, the specific type of wood used such as oak or walnut adds strength and sophisticated richness, respectively. There are also extravagant oak types which flaky, purple, or tiger wood and Brazilian cherry that produces bold colors, Brazilian cherry and tiger wood, accounts as exotic types of wood that produce statement floors.

Methods of construction and finishing vary type floors. With solid parquet flooring, the owner can refinish the floor as many times as needed while engineered parquet floors are more suitable for environments with constant changes in humidity. For flawless installation, the wood flooring has to be in perfect alignment which requires matching patterns, changing directions, and snapping borders.

The Art and Science of Parkay Flooring

The patterned wood flooring that the term parkay refers to also has common spelling variations of parquet. It has recently gained popularity as an alternative to wide some homeowners plank floors. This popularity also indicates the appreciation a society has for complex design and detailed handiwork.

Contemporary parkay floors are installed much easily as some of the course work has already been done in the factory, such as protective coatings like aluminum oxide or UV that increase the durability of the floors.

Parquet manufacturing has also integrated sustainability principles into its processes. Numerous producers responsibly source timber and apply engineered techniques that strategically waste layered precious veneers on stable and eco-friendly substrates. This results in eco-friendly and stylish parkay flooring.

Design Possibilities with Parquet Floor Patterns

Flexibility in design is one of the strongest traits of parquet flooring. Herringbone, chevron, basket weave, and brick patterns each evoke distinct atmospheres and change the perception of space in unique ways.

  • Herringbone has a classic charm that is frequently found in the European-style interiors.
  • Chevron is a modern take for its sharp angles and cutouts that form intertwining V shapes.
  • Basket weave offers a warm and inviting space with its rich texture.
  • Brick or block patterns have a geometric, neat, and orderly appearance.

In addition, scale is also an important factor. In a large scale, flexible tiny patterns engender an intimate atmosphere, while in a smaller space, oversized patterns easily grab attention. There has also been a shift in trends, with light tones of parquet, grey, and even whitewashed finishes gaining popularity. They have a soft and modern appeal accented by the fact that matte finishes are preferred for the ability to disguise minor wear.

Factors to Consider When Installing Parquet Flooring

Parquet flooring requires the proper technique to ensure that both the beauty and durability are preserved. The artwork on the flooring will be disrupted, or the lifespan will be shortened, if the subfloors are unlevel.

There are different methods to install the flooring.

  • Regarding solid parquet on wood subfloors, nail-down is the most effective approach substitute.
  • Glue provides exceptional stability on concrete; therefore it is used in the glue-down approach.
  • Floating click-lock systems are obtainable in engineered parquet, however, they may not be designed to accommodate detailed patterns.

Another consideration is the climate.

Care and Maintenance of Parquet Floors

With the right preservation, parquet floors can last multiple generations. The daily maintenance includes sweeping with a vacuum that is safe for hardwood floors to remove the grit and dust. Damp mopping will be enough to freshen up the floor; however, the mopping must not be done with standing water. Use a cleaner that is right for the material of the floor.

Protective measures are a must. Floors are most certainly protected when furniture with felt pads underneath, rugs in busy areas, and mats outside of doors are used.

The wear and tear on surfaces from use can often be repaired through scneiigsh refinishing. As a rule, solid parquet surfaces can be refinished over and over again. Engineered options have to do with veneer thickness. Parquet patterns can be intricate, which can pose certain complications, thus requiring the attention of a professional.

Comparing Parquet Flooring to Other Wood Flooring Options

Compared to conventional wooden planks, parquet flooring is far more eye-catching. The patterns add a focal point to spaces that transform interiors from basic to more elaborate.

Most of the time, the price of parquet is comparable to that of quality planks, however, the installation cost is higher because of the skill needed to accurately match the patterns. It is often viewed as a means of investment, because parquet as flooring can maximize the property within the real estate market.

The amount of durability parquet offers as a flooring option is very respectable ne compared to other wooden floor options. The multi-directional design of parquet flooring helps disguise wear as well as traffic patterns much more than linear planks, which helps the parquet to sustain its elegant condition for many decades.

Historical Significance and Modern Interpretations

The beginning of the story of Parquet starts in the sixteen century with the use of and creation of parquet in France. The artwork was beautifully designed and served as a more comforting substitute to the traditional cold and hard marble. As time passed, it was used to symbolize the prestige of location and the quality of craftsmanship that was posed by that area.

Today, parquet de plans still undergoes artistic advancements and technology improvements that assure easier installation and better quality finishes through responsible production processes.

How to Choose the Correct Parquet Flooring for Your Space?

Parquet flooring for the room’s function, illumination and aesthetics should pair well. Bespoke dining rooms can work well with intricate dark walnut herringbone, and family rooms are better off with oak in any style.

The functionality of the building’s architecture should also be considered. For instance, antique houses lend themselves to conventional patterns, whereas curvilinear houses showcase the elegant difference of slim chevron with gargantuan linear blocks. Smaller spaces benefit from light-tones, whereas larger rooms flop with deep hues.

Although the initial purchase may rival the competition, the enduring beauty and practicality of parquet more than justifies the investment in the long run.

What to Expect from the Installation Experience?

The installation can be a time-consuming process since the layout precursors require precise planning to achieve a balance in the installation, which also ensures to reduce the probability of wasting any resources. Depending on the intricacy of the patterns, there can be several configurations that can dramatically increase time. The install finish is done off site and may comprise sealing boards prior to installation, or staining and sanding, or applying sealant to unfinished boards of panels that were pre finished and sealed. The installers specified and listed the upkeep of such floors, ensuring that the owners know what steps to take to protect the investment.

Long-Term Value and Enjoyment of Parquet Flooring

The enjoyment and value that comes with parquet flooring is not something that fades with the passing years. Unlike something that can be discarded merely for a single contemporary perception or thought, parquet flooring has retained its usefulness throughout the ages. The artistic charm of parquet floors, their inviting warmth, and their ability to withstand great wear, transform something that once laid flat, into a masterpiece that enhances the entirety of a room.

Steps taken on a parquet floor offer a warm embrace to the feet and an aesthetically pleasing dance for the eyes. Such floors, the beating hearts of a home, give the feeling of living with not just a documented piece of heritage, but a wonderful piece of art. Many real estate professionals have claimed that homes with parquet installations stand out to buyers and such flooring is sure to draw attention.

If easy to maintain floors with lasting beauty is what you yearn for, then the custom creations woven with the endless charm of oak and herringbone, offered within parquet flooring give a glorious promise of all the charm, elegance, and artistry that can only come with unmatched durability.

Frequently Asked Questions

Is parquet flooring expensive?

As with all beauty, parquet comes with a cost and is usually on the same line as high quality plank flooring. Unlike plank flooring though, parquet entails and warrants an attitude of care and precaution due to intricacy involved in the installations.

How long does parquet flooring last?

Giving them the maintenance they deserve, parquet floors can last for over 50 years with proper usage of upkeep. Solid parquet floors can be refinished multiple times, rejuvenating the artistry within, and increasing its overall value and longevity.

Does parkay flooring differ from parquet?

No. Parkay flooring is simply a common misunderstanding of parquet flooring.

Does parquet flooring suits modern houses?

It does. Even though parquet has roots in history, parquet floors’ designs are creatively contouring to modern interiors, providing a stylish alternative to simply wooden planks.

What are the cares for parquet flooring?

Preventive care, regular sweeping and mopping, and the use of soft rugs and felt pads to a moderate extent helps to maintain the charms of parquet flooring.

Conclusion

More than just a floor, parquet flooring tells a tale of history, craftsmanship, and timeless design. Parquet has enchanted people with the artistry and versatility from the intricately designed floors of Versailles palaces to the more modern houses of today.

The flooring option that you have been looking for is one that has beauty, durability, and grace. You will find that parquet is a timeless investment that will increase the worth of your premises for years to come.

Our Services

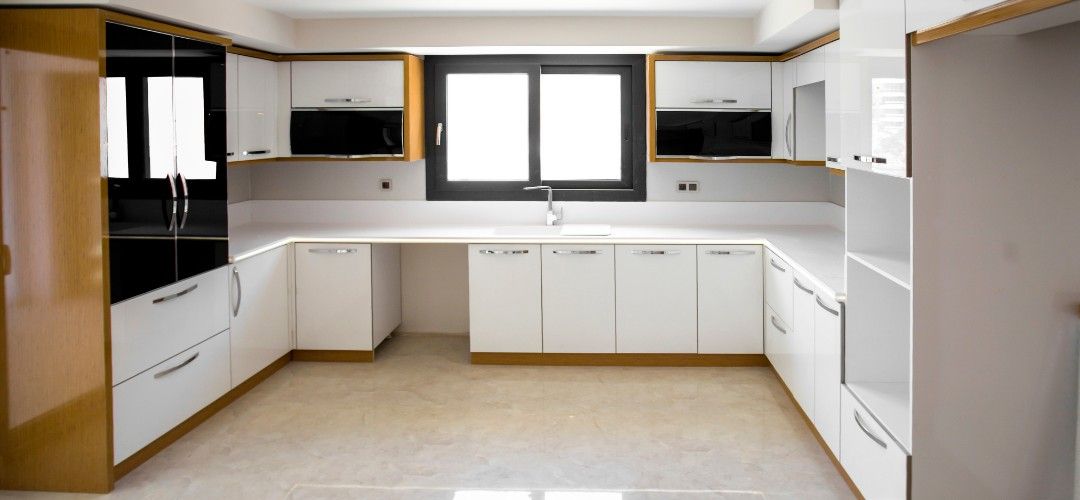
The Complete Guide to Painting Kitchen Cabinets: Costs, Techniques, and Professional Tips

If you keep asking yourself how much does it cost to paint kitchen cabinets, know that lots of other people are in the same boat? Refreshing your cabinets this way is an inexpensive hack that can freshen up the whole room without the fuss-or the bill-of a full remodel. The secret to a long-lasting look lies in learning the right how-to steps so the finish won’t chip or fade within a season. Whether you grab your brushes and roller or hand the job to a pro, following a clear plan helps you end up with results you can show off for years.

Getting a smooth, even coat on your cabinet doors is about more than just pouring paint onto wood. Good prep work, careful sanding, smart choice of brushes, and the best paint for kitchen cabinets also matter, since even a small mistake can ruin the finish. The bright side is that when you follow the process, tired old cabinets can look brand new for a tiny piece of the replacement price-usually $200 to $600 if you do the work yourself, or $1,500 to $5,000 if you hire someone skilled.

In this easy-to-follow guide, well cover everything you need to paint your cabinets-from making a budget to step-by-step how-toss and pro tips you won’t find on the internet. Whether you’re updating tired oak from the 90s or bland builder-grade maple, these tricks will give you a smooth, tough finish that can take the daily grind of any kitchen.

Understanding the True Cost to Paint Kitchen Cabinets

When homeowners ask, how much does it cost to paint kitchen cabinets, the answer always comes back, It depends. If you tackle the job yourself, labor is free but you will pay for good materials. Expect to spend between $200 and $600 for a mid-sized kitchen, with primer, paint, and basic supplies eating up most of that.

The best cabinet paint is rarely the bargain can at the end of the aisle. Pro-grade paints such as Benjamin Moore Advance or Sherwin-Williams Emerald Urethane Trim Enamel cost $50 to $80 gallon but provide better coverage, durability, and smoother finishes than budget options.

Remember to add money for a degreaser ($10 to 15), sandpaper ($10-20), good brushes ($15-30 each), painter tapes ($5-10 each), and fresh hardware if your swapping out knob sand pulls ($10).

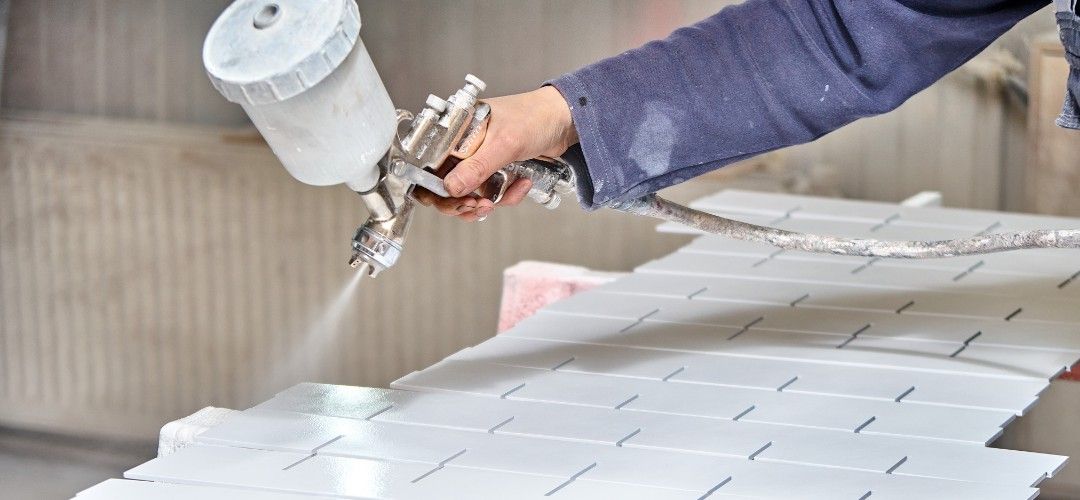
A typical professional cabinet-painting job for the average kitchen can cost between $1,500 and $5,000, and most of that money—around $70 to $80 percent—pays the crew for their time. That number looks huge next to the price of grabbing a few brushes and doing it yourself, but pros knock the project out in days instead of dragging it out for weeks, use high-end sprayers that leave the finish smooth, and often back their work with a warranty. They also tackle every bit of prep work by cleaning, sanding, and filling dings and scratches—job that new weekend warriors usually forget until its way too late.

Step-by-Step: How to Paint Kitchen Cabinets like a Pro


If you decide to learn how to paint cabinets at home, sticking to a step-by-step plan is the fastest way to get a look that lasts. Skipping prep or cheap paint can leave you with drips and chips in no time, while solid materials and careful technique give you a finish people swear came from a shop.

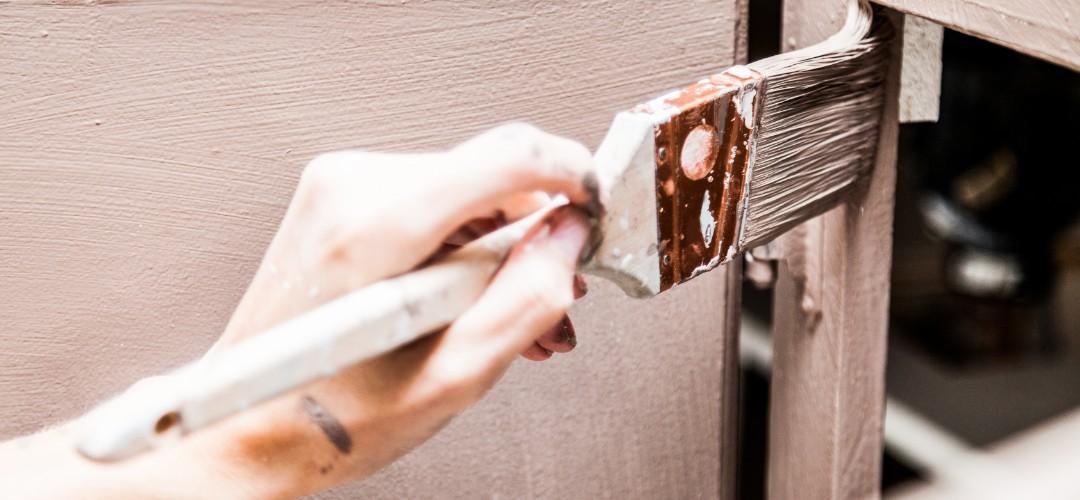
Start by pulling off all doors, drawers, and hardware. It sounds like more work, but trust us-it pays off big in the end. Grab masking tape and a small numbering system so every piece goes right back where it belongs, and you save yourself a pile of grief later. While everything is off, give the hardware a good scrub or splurge on fresh knobs for an easy style boost.

Next up is a good, serious cleaning. The years of cooking grease, random fingerprints, and left-over cleaning product build-up act like a shield, stopping paint from sticking the way you want. Grab a strong cleaner such as TSP-tri-sodium phosphate-or something similar, and then scrub every single panel with a Scotch-Bite pad or a stiff-bristle brush. Rinse everything really well, and let it dry completely before you dive into the next step.

Sanding provides a surface for the primer to adhere to. To remove the old shine from most cabinets, use sandpaper with a grain size of 120 to 150. Then, use 220 grit to smooth out the surface in between coats. Look closely at the areas surrounding knobs and handles; there is typically a ring of used hand oil there. Use a tack cloth or a fresh microfiber rag to remove any remaining dust after sanding; even a small particle can cause a bump in your freshly applied finish.

Choosing and Applying the Best Kitchen Cabinet Paint

Picking the right paint for your kitchen cabinets is huge-it can make the whole project last longer and look way better? Sure, wall paint is cheaper and cleans up fast, but it chips, yellows, and never sticks as well on surfaces that get slammed every day. Good cabinet paint has strong adhesion, fights scratches and stains, and dries so smooth it almost looks factory-done.

For weekend warriors still figuring out how to paint kitchen cabinets, water-based acrylic-urethane blends are the clear go-to. Brands like Benjamin Moore Advance or Sherwin-Williams Emerald Urethane Trim Enamel dry hard enough to shrug off daily abuse, yet clean up with soap and water-lightning quick. They level out nicely, hiding brush marks, and cure fully in 2 to 3 weeks, getting tougher every day after that.

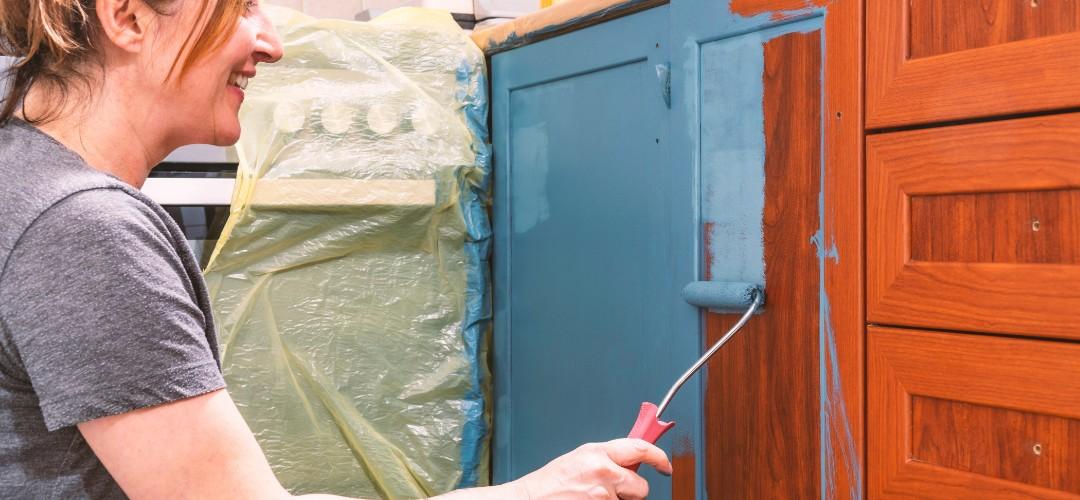
What brush or roller you grab is almost as important as the paint itself when you learn how to paint cabinets. Use a good angled brush- a 2- to 2.5-inch Purdy or Wooster work well- to cut in around edges and corners, and then tip off the wet paint with light, even strokes that hide brush marks. For big, flat areas, a 4- to 6-millimeter foam roller leaves the smoothest finish and avoids the bobble texture cheap rollers create. Try to work in a room with barely any dust and keep the temp between 60 and 80 degrees and humidity between 40 and 60 percent; sudden drafts, heat, or moisture can pop bubbles or crack wet paint.

Even the best cabinet paint is usually meant to be laid down in 2 to 3 thin coats, not one thick blanket, to stick and level properly. A quick pass with 220-grit paper between coats makes the surface baby-bottom smooth and ready for the next layer. Always follow the manufacturer’s drying clock between coats, because jumping the gun can end with peels, soft spots, and finishes too weak for daily kitchen chaos.

Pro Tips for Flawless Cabinet Painting Results

Once you’ve nailed the basics of how to paint kitchen cabinets, a few pro tricks let your project reach showroom levels. Start by painting cabinet frames first; they are hidden enough that any rookie flaws stay out of sight while you work on your technique. When you tackle the doors, prop each one up on pyramids or hang it between two sawhorses so fresh paint never glues it to your drop cloth or tabletop.

Temperature and humidity matter a lot when you’re figuring out how to paint cabinets. The sweet spot is between 60 and 80 degrees with humidity sitting around 40 to 60 percent-anything colder or wetter slows drying and can leave the finish cloudy. If your garage or basement runs too cool or damp, a small space heater or dehumidifier can help keep conditions steady. Bright, angle lighting also counts; it shows sanding marks and paint drips you might miss in flat, overhead light.

When people ask how much it costs to paint kitchen cabinets, the pro option usually looks pricier up front. That’s because painters use spray gear that leaves a super smooth coat almost impossible to get with brushes or rollers. Rentable HVLP rigs work, but they take a little practice so the finish doesn’t end up everywhere except the cabinets. A handy middle ground is to roll or brush the frame and use a matching spray can for the doors-small cans of cabinet paint often give surprisingly nice results on smaller projects.

Keeping Your Freshly Painted Kitchen Cabinets Looking Great

After putting in the work to learn how to paint kitchen cabinets and finally getting the job done, a little everyday care makes sure your hard work stays pretty for a long time. In the first month while the paint is still curing, be especially gentle-don’t hang wet towels on the doors or pile heavy dishes on the shelves, because they can stick and leave marks. After that, wipe the surfaces with mild soap and water; skip tough cleaners that can slowly dull the finish.

If a chip or scratch does show up, sand it lightly and dab on leftover paint-keeping a small jar of your best cabinet paint labeled and nearby makes these touch-ups quick and easy. You might also think about putting in soft-close hinges when you put everything back; they stop the doors from slamming and save the edges from extra stress. With this simple care, good cabinet paint should keep looking fresh for 5 to 10 years before it really needs a refresh.

When to Consider Professional Cabinet-Painting Services

Sure, a do-it-yourself cabinet-painting guide can save you some cash, but there are moments when calling in the pros is smarter. If your doors are warped, sticky with grease, or smeared under years of thick paint, a team with the right gear can strip, sand, and prime them way faster than most weekend warriors. Families with little kids or packed schedules may find it a relief to have the kitchen done in days instead of stretching the project into a month of late-night tapping with a brush.

The price gap between doing it yourself and hiring a crew often boils down to how you value time. When homeowners add up the hours they’ll burn-and the goofs that might pop up- the cost of hiring a pro starts to feel fair because it locks in a clean, even finish. On top of that, most painting companies throw in a warranty, giving you a safety net that a DIY effort simply can’t offer.

Final Thoughts: Enjoy Your Kitchen Transformation

Whether you decide to learn how to paint kitchen cabinets or how to remove paint from hardwood floor efficiently in a weekend or bring in someone who knows the ropes, the payoff is huge and wallet-friendly. Pick tough, durable paint and stick to solid steps, and your kitchen will look fresh and work well for years. Just remember, getting that great finish starts long before the brush hits the door—cleaning, sanding, and priming right will save you headaches later.

All you really need to turn your room into a dream space is a good can of paint and a little time. Plan ahead, budget for quality materials, and give yourself a few patient days and you ll wind up with a look that makes every meal feel special. So grab some color swatches, work out the total, and get ready to fall back in love with the place where you cook, chat, and relax. The pride you will feel seeing the very same cabinets pop with new life is absolutely worth the sweat.

The Ultimate Guide to Pergo Flooring: Laminate, Waterproof, and More

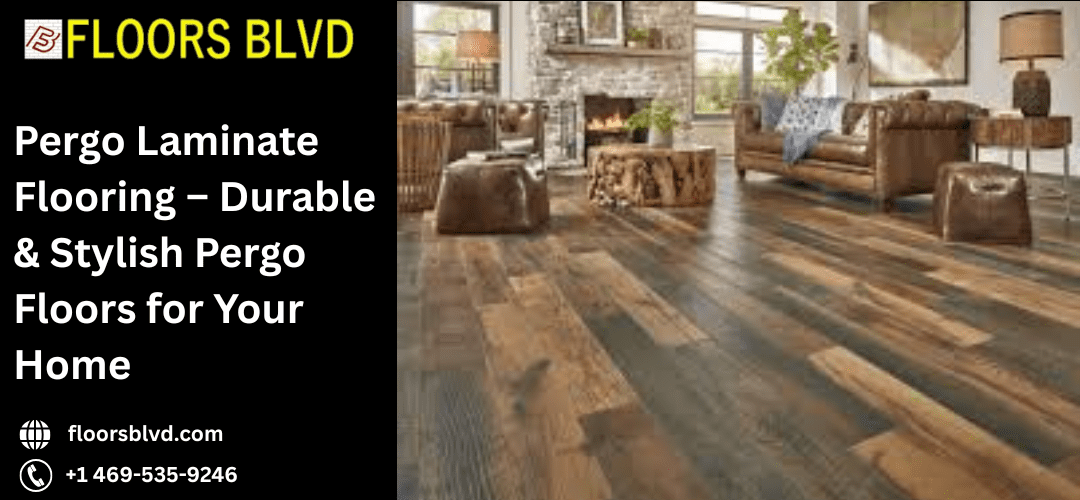
When it comes to durable, stylish, and budget-friendly flooring, Pergo flooring stands out as a top choice for homeowners. Whether you’re considering Pergo laminate flooring, exploring Pergo Outlast flooring, or comparing Pergo flooring vs vinyl, this guide covers everything you need to know. From Lowes Pergo flooring options to the benefits of Pergo laminate flooring waterproof varieties, we’ll help you make an informed decision for your home.

Understanding Pergo Flooring

With its modern laminate technology, Pergo flooring, first introduced in Sweden in the 1970s, completely transformed the flooring market. Pergo laminates flooring still sets industry standards today, offering homeowners a stylish and adaptable flooring option. This type of flooring gives your home an elegant look without breaking your budget by making it look like real stone or hardwood.

With its modern laminate technology, Pergo flooring, first introduced in Sweden in the 1970s, completely transformed the flooring market. Pergo laminate flooring still sets industry standards today, offering homeowners a stylish and adaptable flooring option. This type of flooring gives your home an elegant look without breaking your budget by making it look like real stone or hardwood.

Advantages of Pergo Laminate Flooring

The unique strength of Pergo laminates floorings are one of its main benefits. Pergo floors are perfect for busy homes with kids and pets as their unique layered structure protects them from stains, dents, and scratches. Since its easy installation is a significant advantage; the flooring is a popular do-it-yourself option as it can be easily installed in any space.

Why Pergo Floors Are a Smart Investment

Pergo flooring is known for its ability to blend premium looks with affordability. Once a leader in laminate flooring, Pergo today delivers a variety of choices, such as Pergo Outlast laminate flooring, which offers improved resilience and durability. Pergo and flooring innovations provide just that if you’re searching for a flooring option that looks like stone or hardwood but isn’t as expensive.

Exploring Pergo Flooring at Floors Blvd

Flores Blvd is a good place to start looking for Pergo floors. The Flores Blvd Pergo flooring selection features a wide range of colours, styles, and finishes that will look great in any area. Plus, buying from a trusted store like Flores Blvd guarantees quality and full assistance, from helping you choose your flooring to give you installation tips.

Is Pergo Laminate Flooring Waterproof?

People who own homes often want to know if Pergo laminate flooring is waterproof. This is because moisture is usually a problem for regular laminate floorings. But Pergo has a creative solution to this problem. Many new collections of Pergo laminates floorings feature water-resistant technology, making Pergo flooring perfect for spaces like kitchens and entryways that get wet from time to time.

Introducing Pergo Outlast Flooring

Pergo Outlast flooring is a great addition to the Pergo laminate flooring collection. Pergo Outlast laminate floorings are known for its cutting-edge water-resistant technology, making it virtually waterproof. This is what makes it stand out, especially in bathrooms or basements where there is a lot of moisture. Pergo Outlast flooring lasts a long time and looks great just like real hardwood flooring.

Pergo Flooring vs Vinyl Flooring

When choosing flooring, many homeowners compare vinyl to Pergo. Both have their own pros and cons. Vinyl flooring is great for bathrooms or laundry rooms because it is completely waterproof and soft. Pergo laminate flooring, on the other hand, has better resistance to scratches and dents, looks like real wood since it is made of wood and is also better for the environment.

Maintenance of Pergo and Flooring Tips

Pergo laminate flooring requires very minimal maintenance. Simple sweeping or vacuuming is all that is required for routine cleaning, with the odd damp mop utilizing specialist laminate floorings cleansers. Steer clear of strong chemicals to preserve the durability and beauty of your floor. Pergo flooring that is properly maintained can look brand new for many years.

Pergo and Flooring Trends: What’s New

With trends including larger planks, textured finishes, and eco-friendly materials, the Pergo flooring industry is still changing. Pergo laminate flooring waterproof variations are becoming more and more popular among homeowners because of their style and functionality. Furthermore, Pergo Outlast laminate flooring is now available in stylish whitewashed and grey finishes, which go well with modern designs.

Final Thoughts on Pergo Floors

Pergo laminate floorings are a great option whether you’re remodeling your house or just want to update your flooring. Pergo flooring is becoming more and more popular among homeowners because of its price, ease of installation, durability, and visual appeal. You may have fashionable, long-lasting, and low-maintenance flooring that completely changes your house by choosing the correct product, like Pergo Outlast laminate flooring.

Finding the Best Paint for Kitchen Cabinets

Best paint for cabinets: Looking to give your kitchen cabinets a new coat of paint? Well, there are a few things to consider when choosing the best paint for cabinets!

Before starting with the work, let me tell you that this is a job best left to the experts. I want to say again, do not try this as a DIY project! That said, it can be tough to get the same result as a factory-finished cabinet. Why?

Well, kitchen cabinets painted in factory-settings are painted using industrial-grade paints and equipment. Most insiders often say the best cabinet paint is lacquer or enamel-type oil-based paint. This paint may have gone through an extra curing process in the factory.

Traditionally, cabinet paint was oil-based. However, it is not as easy to find now. Moreover, oil-based paints have a strong and unpleasant odor, take time to dry, and turn yellow over time.

More to it exists! Spray painting is quick, but it requires preparation. Our team tapes and covers other surfaces around the cabinets. Once you use oil-based paints, stick to the same type for each color change.

On the other hand, water-based latex paints have become the de facto standard for paint in the industry. But of course, it comes with its drawbacks, as it peels off/ chips off in a few years.

What is the best paint for kitchen cabinets?

Well, this is a hard one! Most paint companies offer special lines of paint. These paints have the benefits of oil-based paint without the downsides.

The only downside to these paints is the price. They cost more than regular oil-based and water-based latex paints. However, this small extra cost is worth it for a better product that lasts a long time.

In home renovation, you might wonder if experts should spray or roll for a smooth finish. You’ll be happy to know that both methods work well. At Floors Blvd, we choose one method or the other based on the space we are working in.

Spray painting is quick, but it requires preparation. Our team tapes and masks off other surfaces around the cabinets.

If the cabinets aren’t too large, it doesn’t justify the extra time for preparation. This is where a roller and paintbrush suffice.

That said, irrespective which brand you choose as the best paint for cabinets, it needs sanding between coats. The initial coat of paint/ primer often causes the wood grain to rise, thus turning the surface a little rough to the touch. For a professional and smooth result, our team at Floors Blvd, take some time out and sand the surface between the coats.

Most home decor experts generally ask homeowners to go for a semi-gloss finish for the kitchen cabinets. This is often because matte paints are hard to clean.

Shiny or glossy paints show every fingerprint and smudge. So, it is best to get the best of both worlds and settle for a semi-gloss finish. Some of the best cabinet paints come in semi-gloss. They are more durable and give a professional look, even on old cabinets.

However, you can even go for a satin look. The fact that it has a little shine, without being too glossy, is probably what works in its favor. That said, it is not as easy to clean as the semi-gloss finish. Moreover, the latter looks a bit more vibrant and modern.

Choosing Floors Blvd for the perfect cabinets at home

Are your kitchen cabinets old? Perhaps they just need a new coat of paint?

At Floors Blvd, we are here to bring your kitchen cabinets back to life – with the right paint and finishing touch! With ten years of experience in home remodeling, we can help you update your kitchen cabinets. We specialize in kitchen and bathroom renovations. We know how to give your cabinets a fresh look.

At Floors Blvd, our team focuses on kitchen remodeling makeovers. We help you choose the best paint for your cabinets.

We also deliver top-quality craftsmanship. We use only the best products, including laminates, tiles, marble, and granite. This ensures your kitchen looks great and lasts a long time.

Our skills in flooring, waterproofing, and countertop installation help us create a polished kitchen space.

Ready to give your kitchen cabinets a makeover? Connect with Floors Blvd for the best cabinet paint. Your dream kitchen cabinets are just a click away!

Some Frequently Asked Questions

Will you sand or prime the cabinets before starting work?

Even with the best paint for cabinets, some prep work is important. This helps achieve the industrial look that many homeowners want for their kitchen cabinets. That’s why, we carefully sand and prime the cabinets before applying the paint. This ensures a long-lasting finish, added durability, and a professional look and feel all through.

What colors are more popular for kitchen cabinets?

Well, the most popular colors for kitchen cabinets are soft greys, crisp whites, deep navy, and natural greens. No matter which of these you eventually go for, they will create a timeless look.

In fact, you can even go for a two-tone finish, such as white uppers with dark lowers. This gives an added depth to the space. At Floors Blvd, we help homeowners choose the best cabinet paint to match the kitchen decor.

Are there any eco-friendly or low-VOC paints available for cabinets?

At Floors Blvd, we offer a large selection of paints for every need. This includes eco-friendly and low-VOC options. Most of the paints that we work with are safe and sustainable, and are quite durable. We ensure that the colors we use are not only beautiful but also completely safe for children and pets.

Key Differences to Help You Choose the Best Option for Hardwood vs. Laminate Flooring

In all probability you perhaps wish to know the difference between laminate flooring vs hardwood, something that can help you make the big decision on whether to go for the former or instead choose to go for the classic wood flooring. Well, we will talk about the difference, but before all that, let’s figure out the basics.

Laminate flooring is a multi-layer flooring that is made from wood fiber and crafted to replicate the look of natural wood. It generally consists of four different layers, pressed together at very high temperature and pressure. The bottom layer of the laminate flooring protects the core board from moisture and also offers stability. The core layer/ board comprises high-density fiberboard – with 80% wood. This layer offers structural strength and resistance. The next layer is the design layer which comes with a printed design, colours, and patterns. The topmost layer is the transparent surface protection which protects the flooring from the everyday wear and tear.

On the other hand, there’s nothing quite like the beauty of hardwood flooring. These are generally known for their incredible lifespan and stylish looks. Hardwood flooring has been around for centuries. They are durable, available in different options, and are famous for their timely beauty. As you might have guessed already, these come from popular wood species such as oak, cherry, walnut, maple, and more. In fact, solid hardwood flooring comes from a solid piece of milled wood, thus deriving its name. They are available as pre-finished and unfinished panels and can last from 30-100 years.

Laminate flooring vs wood: Key differences between the two

  • Hardwood floors are durable, but that also depends on a few factors, such as whether or not the floor is finished, the type of hardwood used, and how well it is maintained. In fact, well-maintained hardwood floors can last many decades. That said, even the best quality laminate flooring needs to be replaced every 15-25 years.
  • Hardwood is a premium flooring option and hence is quite expensive, but that also makes it one of the most durable options out there. On the other hand, laminate floors are more pocket-friendly and are versatile enough to be used almost anywhere in your home.
  • Here’s another vital factor for those looking for laminate flooring vs wood. Hardwood/ solid wood floors are more prone to moisture penetration and warping. In fact, they can at times even lose their sheen/ color due to excessive moisture. As for laminate flooring, these can withstand a fair bit of moisture – better than hardwood floors, though they cannot handle standing water.
  • Hardwood floors come in a variety of different sizes and cuts, having natural grains and tones. Whereas laminate flooring is a synthetic fiberboard product that mimics the look of other flooring options.
  • When it comes to resale value, hardwood floors are the best. It is a premium material and thus, significantly boosts the pricing of your home. On the other hand, laminate floors are rather simple and though they look premium, they cannot command the same level of resale value as hardwood floors.

How to get paint off wood floors?

A simple can of paint can change the look and feel of your room, but then, paint sometimes lands in spots it shouldn’t – such as your wooden floors! Ideally, you can use a simple rag to wipe the paint off while it is still damp but may need extra effort if you notice it once it has dried. Luckily, we at Floors Blvd are here to help.

Before we dive deep into ways in which we handle ‘how to get paint off wood floors,’ we’d request you not to try these yourself, as some of these may ruin your floors if not done right. This is why we recommend hiring our team of professionals.

  • There are a few commercial paint removers which we apply on areas with paint spills using a cotton swab. We let it stay for 15-20 minutes and then wipe it away. This usually clears most paint spills.
  • Alcohol prep pads are also great for removing paint stains from hardwood floors. In fact, they are a cheaper alternative to commercial paint removers.
  • Some basic cleaning detergents/ dish soaps can also work wonders and come in handy for removing paint spots from hardwood floors.
  • Denatured alcohol also proves quite effective but takes longer than alcohol prep pads. We generally rub it onto the stain and let it soak for about 30 minutes. This loosens the paint, which can then be scrubbed off or gently chipped away.

Frequently Asked Questions

Laminate flooring vs wood: Which of the two is more resistant to scratches and dents?

When it comes to comparing between laminate flooring and wood, the former is more resistant to scratches and dents. This is mainly because laminate is designed to be tough, and the protective layer on top withstands wear and tear better than natural wood. Thus, laminate flooring is better for homes with pets and children.

What are the maintenance requirements for laminate flooring vs wood?

Laminate flooring requires minimal maintenance. Regular sweeping or vacuuming and occasional mopping with a damp cloth is enough to keep it looking new. On the other hand, wood flooring needs more care, including periodic refinishing. In fact, it should be cleaned with wood-safe products so as to protect it from damage. If you’re still not sure, we at Floors Blvd are here to help!

Which flooring type amongst laminate and wood flooring offers more variety in terms of styles and finishes?

In terms of styles and varieties, laminate floors are a better buy over hardwood floors. It can mimic a wide variety of materials, including hardwood, stone, and tile, and can even feature different textures and patterns. In fact, laminate flooring is designed to be versatile and affordable, whereas hardwood floors are crafted to stay natural and look elegant.

Preventing paint stains on hardwood floors: Tips and practices

What good is a renovation/ decoration job, if it doesn’t properly protect the different surfaces of your home? The same goes for your office/ building. If you don’t protect the flooring properly, chances are, you would end up paying a lot more when you eventually try to remove paint from hardwood floors. Here are a few tips on how you can protect your hardwood floors from any and all paint stains.

  • Carpet protection film is a great option for protecting floors, and comes in handy when your home is undergoing extensive renovations and painting. It comes with a built-in adhesive so, you don’t need to worry about taping it when laying it down.
  • You can even go for dust sheets, also at times referred to as drop cloths. The cotton dust sheets are reusable, completely washable, and are long-lasting. This is a traditional option, but is still in use because of its versatility.
  • If you really want to avoid the unnecessary hassle of how to remove paint from hardwood floors, we at Floors Blvd would recommend using the protection fleece. The product is 100% waterproof. It features a sticky film on the underside and an anti-slip surface on top, making it a safe option.
  • Last, but not the least, you can choose to go for the card floor protection – known for use over hard floors. The product is water resistant and is made from an anti-slip material. It comes in rolls and thus can be easily laid down.

How to get paint off wood floors?

A simple can of paint can change the look and feel of your room, but then, paint sometimes lands in spots it shouldn’t – such as your wooden floors! Ideally, you can use a simple rag to wipe the paint off while it is still damp, but may need extra effort if you notice it once it has dried. Luckily, we at Floors Blvd are here to help.

Before we dive deep into ways in which we handle ‘how to get paint off wood floors,’ we’d request you not to try these yourself, as some of these may ruin your floors if not done right. This is why we recommend hiring our team of professionals.

  • There are a few commercial paint removers which we apply on areas with paint spills using a cotton swab. We let it stay for 15-20 minutes and then wipe it away. This usually clears most paint spills.
  • Alcohol prep pads are also great for removing paint stains from hardwood floors. In fact, they are a cheaper alternative to commercial paint removers.
  • Some basic cleaning detergents/ dish soaps can also work wonders and come in handy for removing paint spots from hardwood floors.
  • Denatured alcohol also proves quite effective, but takes longer than alcohol prep pads. We generally rub it onto the stain and let it soak for about 30 minutes. This loosens the paint, which can then be scrubbed off or gently chipped away.

Choosing Floors Blvd for paint removal from hardwood floors

Expertise and experience: Our team of professionals at Floors Blvd have years of experience in handling a wide variety of hardwood flooring types and finishes. We understand the intricacies and challenges of each project and use the best methods to make sure that the paint is removed without any harm to the flooring.

Eco-friendly solutions: At Floors Blvd, we prioritize the health and safety of our clients and the environment. That’s why we mostly use eco-friendly paint removal options – that are not only effective but also non-toxic. Our commitment to using sustainable products is our little way of making an effort to save the environment.

Customer satisfaction: Our customers are at the heart of everything we do, and thus, we provide customized solutions even when we are out to remove paint from hardwood floors. We assess each job individually and deliver the best results. Our dedication to quality and attention to detail helps us restore your hardwood floors to their previous best.

Frequently asked questions

How long does the paint removal process typically take?

At Floors Blvd, the time it takes to remove paint from hardwood floors varies depending on a few factors, such as the type and age of the paint and the area. On an average, the process may take anywhere from a few hours to a couple of days. We carefully assess each situation to provide a more precise estimate, so feel free to connect with us today!

Do you use chemicals or eco-friendly products for paint removal?

At Floors Blvd, we prioritize the safety and health of our clients and their homes. We use both chemicals as well as eco-friendly options for paint removal, depending on the specific needs. All products used by our team are non-toxic and are used to achieve excellent results while minimizing any impact on your indoor environment.

How do you ensure the safety of my floors during the paint removal process?

We take great care to protect your floors during the paint removal process. Our team is trained in the best techniques on how to remove paint from hardwood floors without causing damage. At Floors Blvd, we use specialized tools and gentle chemicals to protect your floors. Apart from this, we test a small area first to ensure compatibility with your floor’s finish.

Key Factors Before Choosing The Right Flooring for Stairs

The fact that you’ve landed on this page means that you are planning on a major home renovation – including the staircase. Well, taking the time to think on how you wish the staircase to look sets the tone for the entire home, and hence, it is time and money well spent. For those who do not have any idea on what they’re getting into, here are a few factors which you should consider while opting for the best flooring for stairs.

  • When it comes to the stairs, safety should be your priority. So, always look for flooring options that aren’t slippery. This would help you avoid unwanted mishaps accidents.
  • Another great factor to consider is the amount of time and money that you are comfortable spending on the maintenance of the staircase flooring. So, options like hardwood floors though look elegant, they need more care than laminate floors.
  • Much depends on your budget! Be sure to determine the square footage of the staircase and the price range before you zero in on any flooring option.
  • Another factor worth considering is the amount of foot traffic the space gets every day . So, a staircase leading to the basement would not require as durable a surface as a staircase located by the front door, or the one heading up to the bedrooms.
  • Last but not the least, choosing the best flooring for stairs also depends on one’s style and preference. Why? Well, because a modern/ contemporary home would need a different flooring for the stairs than a cozy, rustic home.

Pros and Cons of Flooring Choices for Stairs

We’ve already talked about the major factors that you should consider while zeroing in on flooring options for the staircase, now let’s dive into some of the popular choices.

Carpet flooring: This is a popular flooring option for stairs, mostly because it is soft and comfortable. It provides some traction and is clearly one of the safest options out in case you slip and fall. However, these experience a notable wear and tear, and can be particularly difficult to maintain. These accumulate a lot of dirt and thus, you’ll need to vacuum them regularly.

Vinyl plank flooring: Vinyl planks or luxury vinyl planks are a budget-friendly option for the stairs. You can get vinyl surfaces that mimic the look of other premium flooring options available in the market – from tile to stone and hardwood. The fact that these are made up of quality materials is what makes it waterproof and stain-resistant. Moreover, it is extremely easy to maintain.

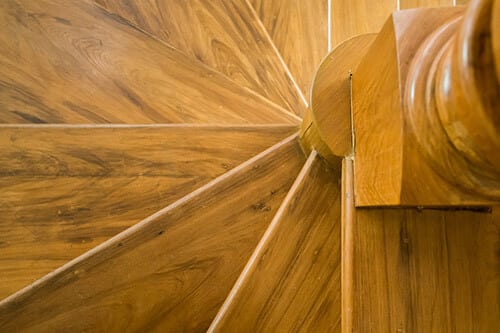
Hardwood flooring: Almost everyone loves the classic and elegant look of the hardwood floors. These are clearly one of the best flooring for stairs. These are known for being extremely durable, are fairly easy to clean, and do not trap allergens and dirt. However, it can be a bit slippery when wet. Of course, you can install no-slip treads to make the polished hardwood safer for your family.

Laminate flooring: Another great option for the stairs is laminate. It is highly versatile and quite pocket-friendly. Laminate can be particularly great if you wish to achieve the wooden look for your staircase floor, and at the same time want it to be a low maintenance option.

Change the look of the stairs with a new flooring over tile

Did you know that you can actually lay a new flooring over the existing tiles on your stairs? Well, now you know! But the question remains as to what flooring over tile would be the best! Our team of experts at Floors Blvd are here to help you.

Ceramic tiles are a familiar sight almost everywhere – be it at office spaces or our own homes. They are sturdy and hard. However, they feel quite dated, and thus, may not work well with the modern design aesthetics of your home. Luckily, you can install other flooring over the existing tile! Here are a few different options that can be laid over the tiles.

Vinyl planks: These are known to be a great versatile option, particularly for use as flooring over tile. These mimic the look of stone or wood flooring and are available in different styles, colours, and textures. Vinyl planks are water-resistant and have a soft feel underfoot, making them an ideal choice for stairs.

Laminate: Laminate floors can also be great for stairs. It is fairly easy to install, is durable, and is available in tons of different designs and textures. Like vinyl, these too can mimic the look and feel of other flooring options. Laminate floors are resistant to scratches and stains, thereby being perfect for high-traffic areas.

Engineered wood: Here’s another stylish and durable choice for flooring over tile. It not only provides the aesthetic look of the hardwood floors, but is also a lot more stable, all while being less prone to moisture damage. Also, it is a great option for people who want to achieve the hardwood look for their stairs without paying a premium.

Frequently asked questions

Should I go for a new flooring over an existing tile flooring on the stairs?

Definitely! You can go for a new flooring over tile on the stairs. It is a practical, as well as a cost-effective way to update the look and feel of the staircase without the unnecessary hassle of removing the old tiles. Options line vinyl planks, engineered wood, and laminates are worth considering. These materials are not only quite durable but also offer a fresh look. For more info on this, feel free to connect with our experts at Floors Blvd.

Which flooring options are resistant to scratches and stains?

Vinyl and laminate flooring are excellent options if you need a flooring that’s resistant to scratches and stains. Both these flooring options are durable and designed to withstand heavy foot traffic. Thus, they are ideal for homes with kids and pets. In fact, you can even go for engineered wood. It offers a balance of aesthetic appeal and resilience.

What are the best flooring options for households with pets?

For households with pets, the best flooring for stairs are vinyl planks and laminate flooring. The fact that vinyl planks are durable, water-resistant, and scratch-resistant, makes them pet-friendly. Laminate flooring too offers the same level of scratch-resistance and is quite easy to clean. If you install any of these, we assure you that in spite of heavy pet activity, your staircase flooring will remain in good condition for years to come.

Vinyl flooring on concrete: What are the steps involved?

When it comes to installing new flooring over an existing concrete floor, you can definitely go for vinyl flooring. Why? Well, mostly because vinyl flooring comes in tons of different options – be it vinyl planks or tiles, vinyl sheets, or even the more premium luxury vinyl planks. In fact, according to many, you can never go wrong with vinyl flooring on concrete. The only thing that you need to keep in mind is that the subfloor should be level and clean. That said, we must confess, laying vinyl flooring/ tiles over concrete does require some preparation. Here’s how we at Floors Blvd handle that and more.

  • The first step to it all is to inspect the concrete floor for cracks and holes and then repairing it meticulously. For this, we either use concrete filler or any similar floor patching compound. If the subfloor has a big crack, we remove a large part of the slab and replace it with a new one.
  • The surface of the concrete floor has to be as smooth and flat as possible. So, we sand down the uneven areas – be it with a sandpaper or with an electric sander. Once it’s done, we clean it with a damp rag to remove the dirt/ dust.
  • In the next step, we wash the concrete floor using a regular household detergent/ degreaser and water. We make sure that the concrete layer is devoid of any greasy spots or grime, and then we leave it to dry.
  • We’ve already told you how to level a concrete floor, and so, in this step we check the moisture level in the concrete subfloor – the lower it is, the better for the vinyl flooring.
  • Lastly, opting for an underlayment adds an extra vapor barrier between the subfloor and the top vinyl layer. It also makes the flooring a little softer to walk on.

How To Remove Carpet Glue On Concrete: Our process at Floors Blvd

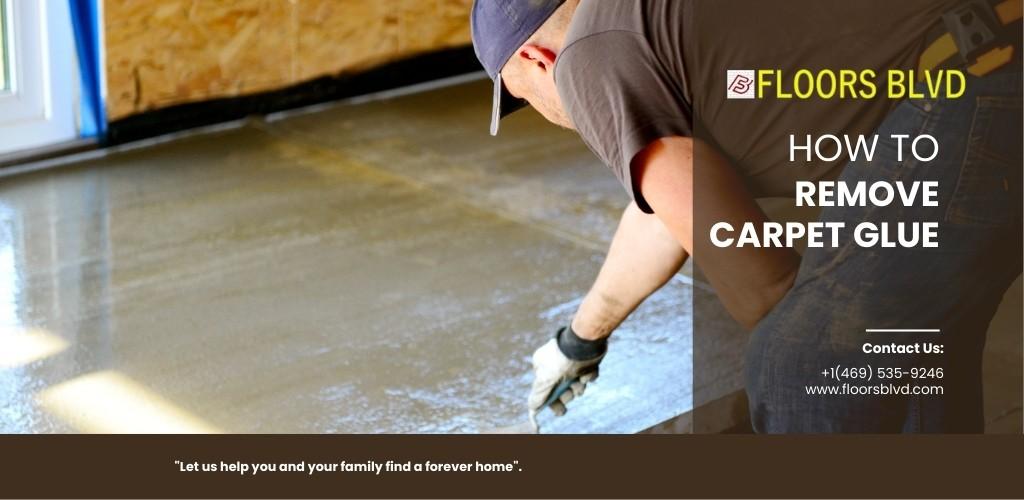
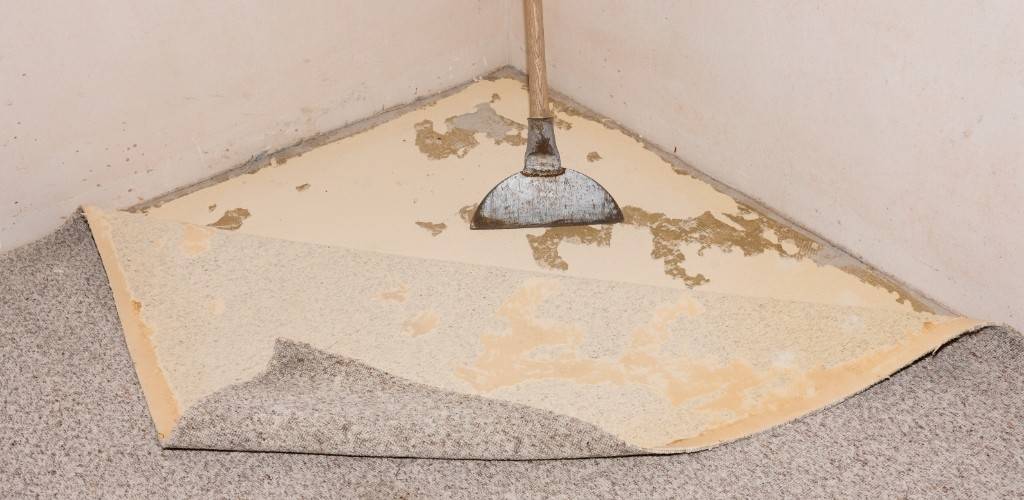
Wondering about carpet glue removal from concrete? Well, for those looking to rip up the old carpeting, tiles, or even the sheet vinyl from the concrete subfloor, we at Floors Blvd are available for help. If you are thinking of doing it yourself, you’re in for a shock soon! Removing stubborn tiles and carpet glue from a concrete floor can take up longer than you anticipate and needs professional help, more so, if you plan on renovating the place and need a new flooring.

At Floors Blvd, we are experts on Carpet Glue Removal From Concrete subfloors. Here’s the process we use.

  • We start with a long-handled floor scraper to get rid of any residual glue. This requires quite an effort, but it’s needed, nonetheless. The process loosens and removes as much glue as possible without hurting the concrete subfloor below.
  • If the glue is water-based, we use a pot of boiling water to soften the glue. This chemical-free method is great and cost-effective. We allow the water to do its magic and then, after a few minutes, scrub the softened glue off.
  • However, not all types of glue are so easy to clean, and that’s when we rely on eco-friendly removers for glue. These are safe for indoor use and are quite effective. We spread the solution on the glue and then wait for the glue to loosen. It is then scraped off.
  • Lastly, there are mechanical methods – such as a floor sander or a buffer fitted with a sanding disk. While this is used for the main floor area, for the sides or harder to reach areas, we use a handheld grinder.

Functional home renovation: How to install tile on concrete floor?

  • The process starts with making sure that the concrete floor is clean, dry, and level all through. Any cracks and bumps that we do notice, are immediately repaired with a concrete filler.
  • In the next step we apply a primer atop the concrete subfloor. This improves adhesion, and hence, is needed for a strong bond between the concrete and the tiles, no matter what type you choose.
  • Here’s another crucial step for those wondering how to install tile on concrete floor. Once we’ve applied the primer, we measure the area and mark guidelines for precise tile placement. This helps us avoid alignment issues.
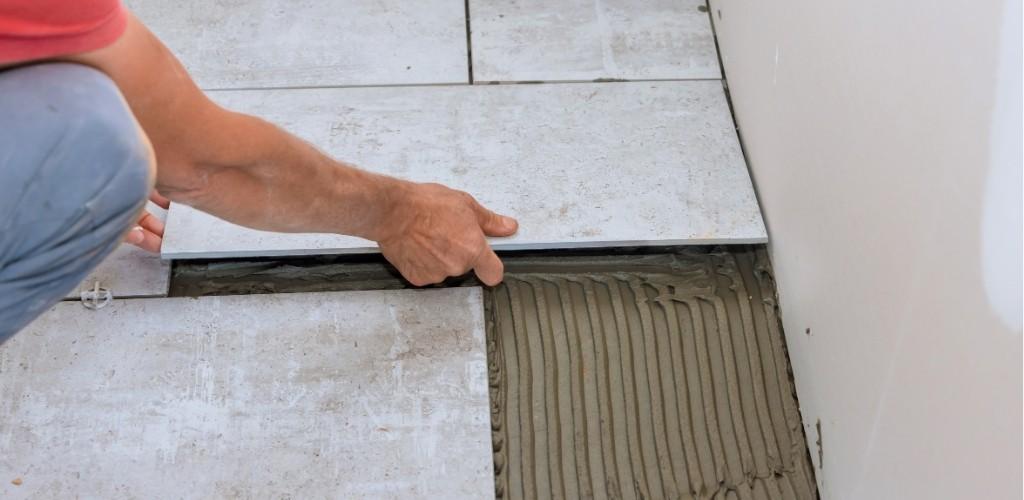
  • The next step is to spread some tile adhesive and carefully place each tile. We use spacers to maintain consistent gaps between the tiles for grout.
  • For the edges and any odd angles, we use a tile cutter to cut the tiles perfectly, ensuring a perfect fit all the time.
  • Once the adhesive and the tiles are set, we remove the spacers and apply the grout, wiping away the excess grout with a damp sponge. We then clean the tiles thoroughly and then apply a coat of a special sealant to protect the grout and tiles.

Frequently Asked Questions For How To Level A Concrete Floor

How durable is vinyl on concrete compared to tile?

We’ve already discussed vinyl on concrete and how to level a concrete floor, but for those still skeptical about it, let us assure you that vinyl on concrete is highly durable and resistant to stains, scratches, and moisture, making it a great option for areas with heavy foot traffic. That said, while vinyl offers more comfort, tiles are known for their superior strength and longevity.

Can you install tile directly on a concrete floor?

Yes, tiles can be directly installed on a concrete floor. However, for a successful installation, the concrete surface must be clean, free of cracks, and even level. We’ve listed the steps above on how to install tile on concrete floor to achieve a professional look. It should give you some idea of our process.

Do I need an underlayment for vinyl flooring on concrete?

At Floors Blvd, we recommend using an underlayment for laying a vinyl floor over concrete. The underlayment provides a much-needed moisture barrier, thereby reducing the risk of mold and mildew. That’s not all! It acts as an extra layer of insulation, making the vinyl floor much warmer and comfortable to walk on. It also smooths out the minor imperfections of concrete and heightens the longevity of the vinyl flooring.

Sagging Floor Repair: Understanding The Causes Behind Uneven Floors

How to Fix Uneven Floor with the Best Engineers in Texas?

Are you having trouble walking in a straight line in your house or tripping over after you walk a few meters? It’s because of the uneven floorboard or cracking and protruding tiles which is also known as sagging floor. This damage can be serious and with time affects the structural integrity of the house, if sagging floor repair is left unaddressed.

It is quite understandable that the floors of the house are a centerpiece, which reflects the style and preferences of the homeowner. Thus, when a floor becomes saggy it not only affects the aesthetic appearance but also affects the other parts of the house. So, whatever the situation, you must not ignore the signs of damage, otherwise, your home might not be safe for you to stand and walk on.

Floors Blvd can provide instant sagging floor repair services to keep you and your family safe. Our excellent workmanship exceeds the client’s expectations, and our trust and reliability have also created a satisfactory client base. For more than 10 years, our professionals have been licensed and committed to providing insured uneven floor solutions. It’s our responsibility to get the job done right.

Expert Sagging Floor Repair For Texas Homeowners

It is not always the fault of the homeowner that leads to sagging floors, but Texas’s extreme weather conditions are equally responsible; where there are prolonged droughts, followed by excessive rainfall. During the dry spell, the soil beneath the home starts to sink which creates an avoidance and during excessive rain, this soil expands which puts pressure on the foundation – This pull and push effect damages the flooring of the house.

There can also be other factors that contribute to this problem such as poor maintenance, improper installation, and choosing the wrong type of flooring due to miscalculation of traffic volume. To deal with this stress, you need an experienced handyman, who knows the perfect uneven floor solutions.

Signs of Sagging Floor

Identifying the signs that the floor is saggy can be tricky. If you are still not convinced to hire a general contractor or floor specialist for sagging floor repair, then look for tell-tale signs, such as – When you are trying to pull the upper Jenga tower on the floor, but it keeps falling in the same direction, or when your kids are rolling the car to the center of the room it keeps going to a different direction. These are a few everyday noticeable changes that something is wrong with your flooring.

So, now it is time to pay attention to the minute new details.

Cracks in the wall, even if it can be a hairline running across the plaster or drywall in your home, indicate the floor is saggy.

If you find that your windows and doors are sticking, then it’s time to ask if it is seasonal or if is it happening all the time. “Yes” to the later question indicates there is a sagging floor which is making the windows and door frames go out of shape.

Do you find the items kept on a table rattling, when you are walking past them, then it indicates that the floors are bouncy or squeaky or there is a lack of proper support underneath.

Your floor needs immediate uneven floor solutions if there is a crack in the girth or the tiles or the floors are out-of-level.

If you all find uneven space under the baseboard and the gap is starting to widen in one corner, then it is a definite sign that the floor is sagging.

What Causes Sagging Floors?

The most common reasons behind every sagging floor are –

Implementation of the wrong floor construction technique

If your house has been aging, then it requires integral support as most of the houses in Texas are constructed using pier-and-beam foundations. These, with time rot, and sag, are affected due to pests, and moisture, leading to uneven floors. There is also widespread soil instability reported in Texas, which creates foundation problems. Moreover, the uneven settlement of the foundation also has a negative impact on the structure of the house leading to a saggy floor.

Environment conditions and weather change

Saggy floors that occur due to adverse environmental impact occur gradually. If the wood in the flooring absorbs excessive moisture, it becomes malleable and blends due to the extreme pressure. Also, the flooring expands, causing the floor to become sloppy. Moreover, if unaddressed the moisture can leak into the basement, causing moisture pooling and cracks in the foundation.

How to Avoid Expensive Sagging Floor Repair?

Floors Blvd has an expert team to guide you on how to avoid floor sagging and expensive repairs with proper maintenance.

  • You should not clean the hardwood floor, luxury vinyl planks, and laminates with too much water.
  • The best cleaning method is to vacuum, sweep, and dry mop; you can use a wet mop only if there is a stain or need to disinfect the place.
  • With proper protective measures, runners or throw rugs, you can control high-traffic areas.
  • Floors Blvd is there to help you detect whether the product has UV inhibitors for light resistance.

How to Fix Uneven Floors with Professional Support?

Did you know that every flooring has its exclusive features and characteristics? Thus, it’s time to appreciate the interior designs that complement your house. Choosing the right floor type and uneven floor solutions, not only includes functionality but also enhances the aesthetics.

When you are choosing a flooring type, it’s important to opt for a perfect blend of both comfort and safety as well as the level of maintenance and future repair work requirements. Floors Blvd has a team of structural engineers and foundation specialists who can easily identify the causes of the soil and climate conditions leading to a saggy floor.

We can provide long-term uneven floor solutions that would not only stabilize the soil but also minimize the movement. Your safe place becomes unsafe for living with the growth of molds, causing serious health hazards. Leave it to us, as we ensure no other issues occur. Our process is not a one-size-fits-all, rather to achieve maximum strength we reinforce materials that would meet the tailored condition of the house.

Floors Blvd – We Meet Every Unique Flooring Need

Floors Blvd ensures that every work is done sufficiently and under the supervision of professionals. We ask our clients whether they are going to have kids or pets, or how much foot traffic there’s going to be so that the flooring can handle it all. These answers will not only help you to save future hogging and sagging floor repair expenses but also keep your house going for a long time. Floors Blvd abides by – Nothing can be compromised with durability, cost-effectiveness, and safety. Contact us to get the best flooring material that fits the unique house style and design, effortlessly.

Frequently Asked Questions

What causes sagging floors and how can I identify them?

Floors can sag due to many reasons, such as structural shifts, due to leaks and humidity/ moisture, inadequate support in the subfloor, and even improper installation techniques, just to name a few. As for identifying these, you can do so by noticing uneven surfaces, visible dips, and creaking sounds. If you suspect a problem, feel free to get in touch with our team at Floors Blvd. We specialize in sagging floor repair.

What preparation is required for installing vinyl flooring over another floor?

When it comes to installing vinyl flooring over another floor, preparation is the key. First, we ensure that the existing flooring is clean and dry. If it is uneven, we proceed with some repair work. But if the floor is level and smooth, we proceed with the installation. At times, we even sand the surface a bit for proper adhesion of the new vinyl flooring.

What are the benefits of installing vinyl flooring over an existing floor?

Installing vinyl flooring over an existing floor can be quite advantageous. If the existing floor is in good condition, it will do away with the need for floor removal and disposal and would thus save you time and money. Whether you come to us or visit vinyl flooring stores near me in Texas, you can explore a wide range of styles and options to choose from – options that will not only add to the beauty of the space but would also be quite pocket-friendly.