If you keep asking yourself how much does it cost to paint kitchen cabinets, know that lots of other people are in the same boat? Refreshing your cabinets this way is an inexpensive hack that can freshen up the whole room without the fuss-or the bill-of a full remodel. The secret to a long-lasting look lies in learning the right how-to steps so the finish won’t chip or fade within a season. Whether you grab your brushes and roller or hand the job to a pro, following a clear plan helps you end up with results you can show off for years.
Getting a smooth, even coat on your cabinet doors is about more than just pouring paint onto wood. Good prep work, careful sanding, smart choice of brushes, and the best paint for kitchen cabinets also matter, since even a small mistake can ruin the finish. The bright side is that when you follow the process, tired old cabinets can look brand new for a tiny piece of the replacement price-usually $200 to $600 if you do the work yourself, or $1,500 to $5,000 if you hire someone skilled.
In this easy-to-follow guide, well cover everything you need to paint your cabinets-from making a budget to step-by-step how-toss and pro tips you won’t find on the internet. Whether you’re updating tired oak from the 90s or bland builder-grade maple, these tricks will give you a smooth, tough finish that can take the daily grind of any kitchen.
Understanding the True Cost to Paint Kitchen Cabinets

When homeowners ask, how much does it cost to paint kitchen cabinets, the answer always comes back, It depends. If you tackle the job yourself, labor is free but you will pay for good materials. Expect to spend between $200 and $600 for a mid-sized kitchen, with primer, paint, and basic supplies eating up most of that.
The best cabinet paint is rarely the bargain can at the end of the aisle. Pro-grade paints such as Benjamin Moore Advance or Sherwin-Williams Emerald Urethane Trim Enamel cost $50 to $80 gallon but provide better coverage, durability, and smoother finishes than budget options.
Remember to add money for a degreaser ($10 to 15), sandpaper ($10-20), good brushes ($15-30 each), painter tapes ($5-10 each), and fresh hardware if your swapping out knob sand pulls ($10).
A typical professional cabinet-painting job for the average kitchen can cost between $1,500 and $5,000, and most of that money—around $70 to $80 percent—pays the crew for their time. That number looks huge next to the price of grabbing a few brushes and doing it yourself, but pros knock the project out in days instead of dragging it out for weeks, use high-end sprayers that leave the finish smooth, and often back their work with a warranty. They also tackle every bit of prep work by cleaning, sanding, and filling dings and scratches—job that new weekend warriors usually forget until its way too late.
Step-by-Step: How to Paint Kitchen Cabinets like a Pro

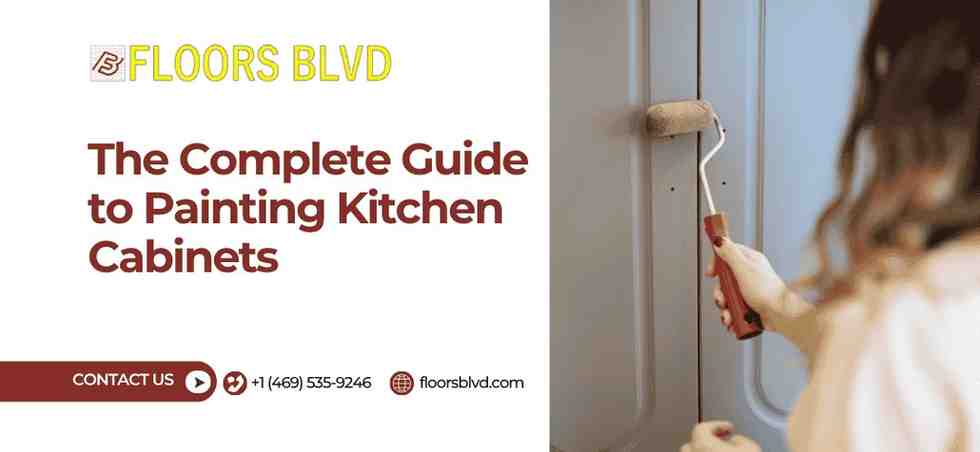
If you decide to learn how to paint cabinets at home, sticking to a step-by-step plan is the fastest way to get a look that lasts. Skipping prep or cheap paint can leave you with drips and chips in no time, while solid materials and careful technique give you a finish people swear came from a shop.
Start by pulling off all doors, drawers, and hardware. It sounds like more work, but trust us-it pays off big in the end. Grab masking tape and a small numbering system so every piece goes right back where it belongs, and you save yourself a pile of grief later. While everything is off, give the hardware a good scrub or splurge on fresh knobs for an easy style boost.
Next up is a good, serious cleaning. The years of cooking grease, random fingerprints, and left-over cleaning product build-up act like a shield, stopping paint from sticking the way you want. Grab a strong cleaner such as TSP-tri-sodium phosphate-or something similar, and then scrub every single panel with a Scotch-Bite pad or a stiff-bristle brush. Rinse everything really well, and let it dry completely before you dive into the next step.
Sanding provides a surface for the primer to adhere to. To remove the old shine from most cabinets, use sandpaper with a grain size of 120 to 150. Then, use 220 grit to smooth out the surface in between coats. Look closely at the areas surrounding knobs and handles; there is typically a ring of used hand oil there. Use a tack cloth or a fresh microfiber rag to remove any remaining dust after sanding; even a small particle can cause a bump in your freshly applied finish.
Choosing and Applying the Best Kitchen Cabinet Paint

Picking the right paint for your kitchen cabinets is huge-it can make the whole project last longer and look way better? Sure, wall paint is cheaper and cleans up fast, but it chips, yellows, and never sticks as well on surfaces that get slammed every day. Good cabinet paint has strong adhesion, fights scratches and stains, and dries so smooth it almost looks factory-done.
For weekend warriors still figuring out how to paint kitchen cabinets, water-based acrylic-urethane blends are the clear go-to. Brands like Benjamin Moore Advance or Sherwin-Williams Emerald Urethane Trim Enamel dry hard enough to shrug off daily abuse, yet clean up with soap and water-lightning quick. They level out nicely, hiding brush marks, and cure fully in 2 to 3 weeks, getting tougher every day after that.
What brush or roller you grab is almost as important as the paint itself when you learn how to paint cabinets. Use a good angled brush- a 2- to 2.5-inch Purdy or Wooster work well- to cut in around edges and corners, and then tip off the wet paint with light, even strokes that hide brush marks. For big, flat areas, a 4- to 6-millimeter foam roller leaves the smoothest finish and avoids the bobble texture cheap rollers create. Try to work in a room with barely any dust and keep the temp between 60 and 80 degrees and humidity between 40 and 60 percent; sudden drafts, heat, or moisture can pop bubbles or crack wet paint.
Even the best cabinet paint is usually meant to be laid down in 2 to 3 thin coats, not one thick blanket, to stick and level properly. A quick pass with 220-grit paper between coats makes the surface baby-bottom smooth and ready for the next layer. Always follow the manufacturer’s drying clock between coats, because jumping the gun can end with peels, soft spots, and finishes too weak for daily kitchen chaos.
Pro Tips for Flawless Cabinet Painting Results

Once you’ve nailed the basics of how to paint kitchen cabinets, a few pro tricks let your project reach showroom levels. Start by painting cabinet frames first; they are hidden enough that any rookie flaws stay out of sight while you work on your technique. When you tackle the doors, prop each one up on pyramids or hang it between two sawhorses so fresh paint never glues it to your drop cloth or tabletop.
Temperature and humidity matter a lot when you’re figuring out how to paint cabinets. The sweet spot is between 60 and 80 degrees with humidity sitting around 40 to 60 percent-anything colder or wetter slows drying and can leave the finish cloudy. If your garage or basement runs too cool or damp, a small space heater or dehumidifier can help keep conditions steady. Bright, angle lighting also counts; it shows sanding marks and paint drips you might miss in flat, overhead light.
When people ask how much it costs to paint kitchen cabinets, the pro option usually looks pricier up front. That’s because painters use spray gear that leaves a super smooth coat almost impossible to get with brushes or rollers. Rentable HVLP rigs work, but they take a little practice so the finish doesn’t end up everywhere except the cabinets. A handy middle ground is to roll or brush the frame and use a matching spray can for the doors-small cans of cabinet paint often give surprisingly nice results on smaller projects.
Keeping Your Freshly Painted Kitchen Cabinets Looking Great

After putting in the work to learn how to paint kitchen cabinets and finally getting the job done, a little everyday care makes sure your hard work stays pretty for a long time. In the first month while the paint is still curing, be especially gentle-don’t hang wet towels on the doors or pile heavy dishes on the shelves, because they can stick and leave marks. After that, wipe the surfaces with mild soap and water; skip tough cleaners that can slowly dull the finish.
If a chip or scratch does show up, sand it lightly and dab on leftover paint-keeping a small jar of your best cabinet paint labeled and nearby makes these touch-ups quick and easy. You might also think about putting in soft-close hinges when you put everything back; they stop the doors from slamming and save the edges from extra stress. With this simple care, good cabinet paint should keep looking fresh for 5 to 10 years before it really needs a refresh.
When to Consider Professional Cabinet-Painting Services

Sure, a do-it-yourself cabinet-painting guide can save you some cash, but there are moments when calling in the pros is smarter. If your doors are warped, sticky with grease, or smeared under years of thick paint, a team with the right gear can strip, sand, and prime them way faster than most weekend warriors. Families with little kids or packed schedules may find it a relief to have the kitchen done in days instead of stretching the project into a month of late-night tapping with a brush.
The price gap between doing it yourself and hiring a crew often boils down to how you value time. When homeowners add up the hours they’ll burn-and the goofs that might pop up- the cost of hiring a pro starts to feel fair because it locks in a clean, even finish. On top of that, most painting companies throw in a warranty, giving you a safety net that a DIY effort simply can’t offer.
Final Thoughts: Enjoy Your Kitchen Transformation

Whether you decide to learn how to paint kitchen cabinets or how to remove paint from hardwood floor efficiently in a weekend or bring in someone who knows the ropes, the payoff is huge and wallet-friendly. Pick tough, durable paint and stick to solid steps, and your kitchen will look fresh and work well for years. Just remember, getting that great finish starts long before the brush hits the door—cleaning, sanding, and priming right will save you headaches later.
All you really need to turn your room into a dream space is a good can of paint and a little time. Plan ahead, budget for quality materials, and give yourself a few patient days and you ll wind up with a look that makes every meal feel special. So grab some color swatches, work out the total, and get ready to fall back in love with the place where you cook, chat, and relax. The pride you ll feel seeing the very same cabinets pop with new life is absolutely worth the sweat.