Laminate Flooring Installation Allen, TX
Read on for a general guide to installing laminate flooring in Allen, TX. Afterwards, we’ll get into more detail in a bit.
Laminate Flooring Installation
First of all, you’ll need the following equipment:
- Click-lock laminate flooring (the most important thing)
- Underlay
- Plastic Sheeting
- Tape Measure
- Rubber Mallet
- Pencil
- Straight edge
- Spacers
- Tapping Block
- Painting Tape
- Wood Putty
- Painting Tape
- Hand Saw or Circular Saw
That might seem like a bit much, but the top three are absolutely necessary for the durability of the floor, you probably have the four in the middle somewhere around the house, and the last six can be found at your local hardware store for a reasonable price.
Step 1: Make sure that the subfloor is clean and evenly leveled
One nice feature of laminate flooring installation is that it can be laid over virtually any type of subfloor, including wood, tile, and concrete subfloors. However, if you want your laminate flooring to be level, the subfloor must be level, regardless of the type.
Before laying down the underlayment or the floor planks, clean the subfloor and check thoroughly for any damage and unevenness. Unevenness can be fixed, but it has to be discovered in order for it to be solved.
Step 2: Place the underlay
There are all kinds of underlay choices available for homeowners. Almost all options will contain foam, as it absorbs sound, provides a slight cushion for foot traffic, and provides a barrier to help with insulation. More importantly, an underlay can remove any slight unevenness the subfloor might have. All you have to do is place the underlay over the subfloor and tape it securely by the edges with painter’s tape. This should go without saying, but make sure that the underlay is free of wrinkles.
If the subfloor has significant damage or is quite uneven, then a layer of plywood will probably be needed before applying the underlay, sheeting and flooring.
Step 3: Preliminary Layout
Before you move forward, create a temporary layout by placing the laminate planks where you intend to install them. This should help give you an idea of which planks will need to be trimmed and how many rows of planks you’ll need. It will also give you a general idea of what the finished product will look like.
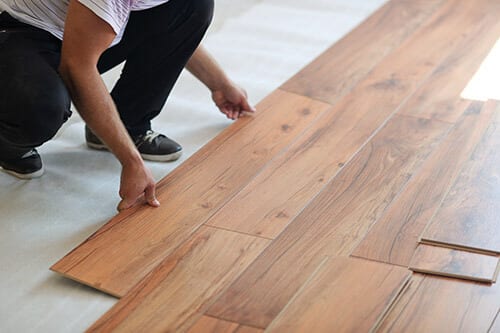
Step 4: Take your time laying down the 1st Row
The first row of laminate is the most important. It’s best to get off to a good start – a bad start could mean having to redo the project. You’ll also have to cut the tongues off of the planks that go against the wall. This brings us to our next point, each plank has both a tongue and a groove. One side of a plank (the tongue) will click and lock into the other side of the other plank (the groove), kind of like a puzzle.
Since the tongues of the planks that are facing the wall won’t have something to attach themselves to, you can cut them. Lay the first row parallel to the longest wall in the room; start from the right and work towards your left (if facing the wall). Place the spacers about ¼ inch between the wall and the first row of planks. That ¼ inch gap is important because it makes an allowance for possible expanding and contracting over time.
For the ends of the planks, take your rubber mallet and tap each end about 2-3 times to make sure the planks are properly connected and that the seams connect properly. Be careful! Don’t be too aggressive, otherwise ends may begin to split.
Step 5: The following rows…
It won’t take long for you to get into installing your laminate flooring. Once you get the first row done, you’ll basically be repeating the process with the rest of the rows. The ends of each row will probably require some cutting. You’ll have to cut the end pieces to allow them to fit against the wall, or in this case, against the spacer. The pieces that you cut at the end of each row can be used to start the subsequent rows.
Make sure that each laminate plank is staggered to avoid seams from lining up and forming H seams. Seams that line up end up ruining some of the appeal and character of your new flooring.
Step 6: Finish the job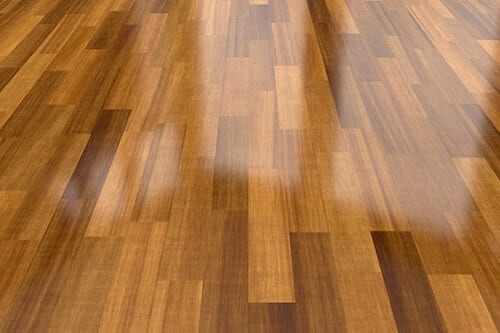
Take out the spacers and install the baseboards to cover the ¼ inch gap. When nailing the baseboards back in, it’s a good idea to use wood putty to fill in the hole created by the nail. Then, just paint over it and no one will even know it’s there.
These are the basic steps. Your laminate wood package should include a manufacturer’s manual help you through the installation process. The purpose of our explanation was simply to show you how easy laminate installation can be. Cutting the planks can be a little tricky, so it’s best if someone who has experience with a saw handles that part. Aside from that, it’s just fitting the planks together like a puzzle.
What makes laminate, well, laminate?
Laminate is made of different layers that are fused together to create one plank. The layers (in order) include:
Melamine Wear layer– withstands general wear and tear caused by foot traffic in a particular room. This layer is scratch-resistant.
Print Layer– high-resolution image of real hardwood. For instance, an image of an oak floor can be made into a print for a laminate plank. The image gives laminate a similar look to actual hardwood.
Fiberboard– the thickest layer, also known as the core. Fiberboard is normally 8 mm to 14 mm in width. This layer helps protect planks against dents and moisture absorption.
Backing– Added layer intended to support the core layer and provide another layer of resistance to moisture trying to seep through.
Why is laminate a good flooring option?
We’ve already discussed how easy laminate installation can be, but what else does laminate have to offer?
Laminate is fairly inexpensive, and that is one of the aspects that draws customers to it. Since it doesn’t contain any actual wood, you won’t have to pay the price of real wood. You’ll e getting an inexpensive flooring material that looks just like hardwood, and is even better than hardwood in some respects.
For example, laminate flooring can handle moisture better than hardwood can. Its many layers make it more difficult for moisture to seep through, whereas hardwood flooring simply absorbs the water. Additionally, since laminate doesn’t contain any actual wood, you won’t have to worry about the water damage done to real hardwood, such as cupping or crowning.
In the end, laminate’s attractions lie in its functionality as opposed to its appearance. While it does have a nice appearance, that doesn’t draw people to it as much as it’s functionality does. Since it’s able to better withstand moisture, laminate flooring can be installed in areas where real hardwood cannot, where it’s too risky to. For instance, in bathrooms, kitchens, basements and laundry rooms.
Laminate normally costs around $4- $5 per square foot. In fact, it’s more popular than quite a few flooring types, including real hardwood, natural stone, porcelain and ceramic. In addition to the actual laminate planks themselves being inexpensive, so is the installation. Even if you choose to have your laminate flooring installed professionally, chances are it’ll still be cheaper than having other types of flooring installed.
What else?
Laminate flooring is easy to clean and maintain. You just have to vacuum or sweep/mop every so often. Dirt and debris don’t have the means to be absorbed into the flooring, so they just sit on the surface and can be easily swept up. While laminate flooring is not 100% waterproof, you won’t have any problems when using a mop on the floor. Just don’t pour the water directly onto the planks. Instead, simply dip the mop into some water and then mop.
Additionally, laminate flooring is considered hypoallergenic flooring. Since dust cannot be absorbed by the flooring, simply sweeping it up will do the job and your family will be allergy-free (at least with regards to flooring). AT the very least, it won’t contribute to anyone’s allergies. Most flooring types are good with stopping allergens from gathering, other than carpet. Carpet is notorious for having allergens and bacteria stuck in it, which is exactly why having carpet requires weekly vacuuming.
Laminate is more versatile than you might think. If you recall the composition of laminate, it has a layer with a high-resolution image. This layer is not just limited to hardwood images. Prints of stone flooring and tile can also be used. Whatever flooring type you want, you can get with laminate flooring. Additionally, if you don’t have the budget for real stone or hardwood flooring, laminate flooring is a great alternative.
The one downside to laminate flooring…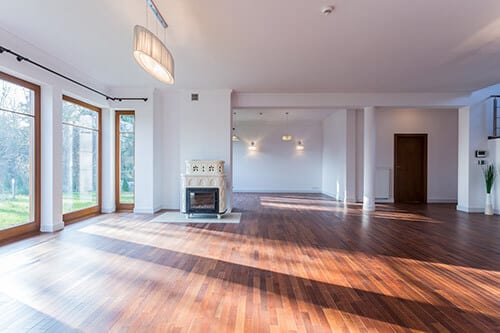
It has a shorter lifetime than other flooring options. Eventually, the wear layer will wear away. Once this layer weakens, the planks will become more susceptible to scratching and general wear and tear.
While wear and tear is also a risk with hardwood, it can be sanded and refinished to basically create a new layer. Unfortunately, the same can’t be said with laminate flooring.
Most laminate flooring is backed by a 10-year warranty, so you can expect it to last around that long, maybe even up to 15 years. If you maintain your floors properly, it may last even longer than that. Ultimately, you get what you paid for.
You get a durable, versatile, easy to maintain floor for an affordable price. A pretty good deal, don’t you agree? Plus, the installation is easy and affordable in itself.
Floors Blvd
If you’re interested in laminate flooring, give Floors Blvd a call at (469) 535-9246. We always have a vast laminate flooring selection in stock, and our staff is always ready to answer any questions that you might have.
Also, if you need help having your laminate installed, Floors Blvd can help! We’ll complete an estimate and then we’ll complete the installation for you.
Please visit our website—https://www.floorsblvd.com—to learn more about our products and services. Also, check out our blog for more info!
Looking for the Best Flooring & Remodeling in Allen, TX?
We offer quality flooring and top-rated remodeling services. Call us now at (469) 535-9246 for more information.
Contact Us Today:
Hours of Operation:
Monday-Friday: 10AM – 6PM
Saturday: 10AM – 3PM
Sunday: CLOSED


204 N Greenville Ave #400
Allen, Texas 75002
(469) 535-9246
Email Us